Google Recently Made Some Major Changes to the Way It Displays Local Search Results.
In the past, a local search query would pull a map with links to seven relevant businesses immediately beneath it.
Within SEO circles, this was known as the “7-pack.” For local businesses, it was known as one of the best places to be in search results.
From “7-Pack” to “3-Pack”
A few months ago, Google replaced the “7-pack” with a new “3-pack.” The 3-pack was chosen in response to the incredible surge in mobile traffic, and Google wanted to make their search results were easily readable on mobile devices.
Everything looks and functions as it did before, but with four fewer results, so companies that were ranking in positions 4-7 have been dropped from the local listings.
As you’d expect, this hurt those brands that showed up in spots 4-7.
Step One to Rank in Local Listings
If your business doesn’t show up in the 3-pack, there are two things you must do:
- Make sure your website is properly optimized for local search
- Make sure your business is properly listed with Google
In this article, I’ll focus on the latter.
If you’ve already claimed your listing, I’ve included a few tweaks you can make to improve your chances of finding your place in the 3-pack.
First Things First: It’s Not About Your Platform
Before we go too deep, let me answer a question I know some of you probably have.
For local listings, it doesn’t matter how you’ve built your website or if you have a strong working knowledge of technical SEO. Local listings are about the business itself, not the website platform you’re using.
If you have a WordPress site or you have a hosted site from a place like Shopify, the steps you’ll need to take will be the same.
Formally Listing Your Business in Google
To properly list your local business with Google, you’ll need to set up a Google My Business account.
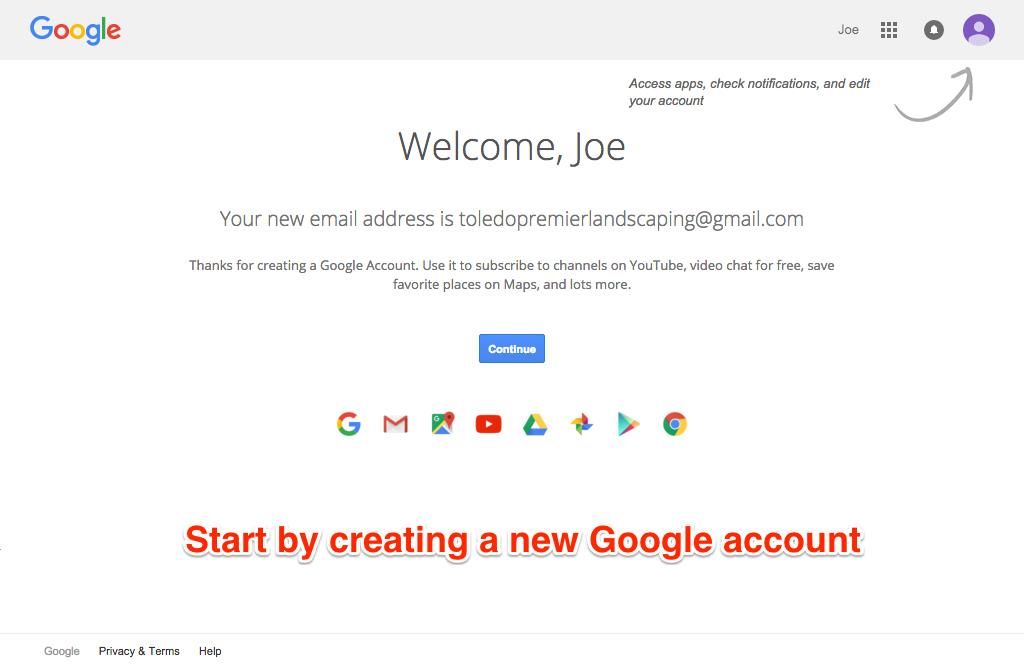
Set up a New Google account
The first thing you want to do is set up a new Google account just to manage this local listing.
While it is possible to use your business or personal Google account for local listings, setting up a different account will make things much easier down the road.
Pro Tip: Clear your website history and cache before setting up the new Google account. Doing so will keep your personal browsing history from interfering with the work you’re about to do.
Go to the Google My Business Page
After you’ve created your new Google account, you’ll want to go to Google My Business’ site. That can be found at google.com/business.
Log in using your new account’s username and password.
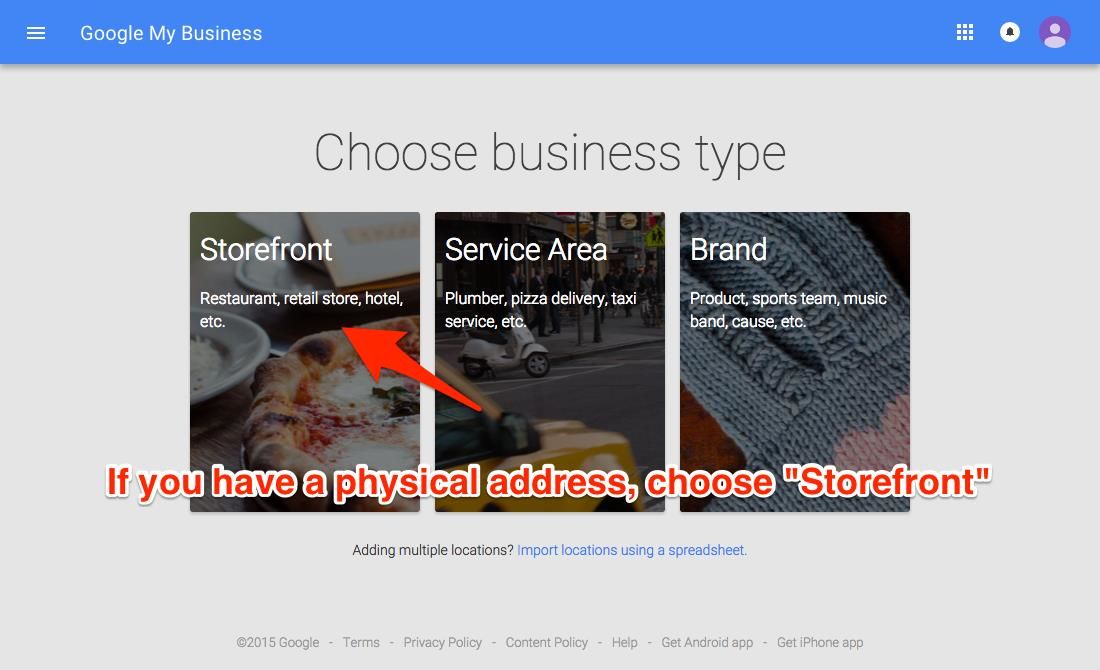
Select Your Business Type
As a local small business with a physical location, you’ll want to choose “storefront” for your business type.
That word “storefront” can be confusing, but it just means any business with a physical address, including CPA firms, lawyers, doctors, etc. – not just stores with a literal storefront.
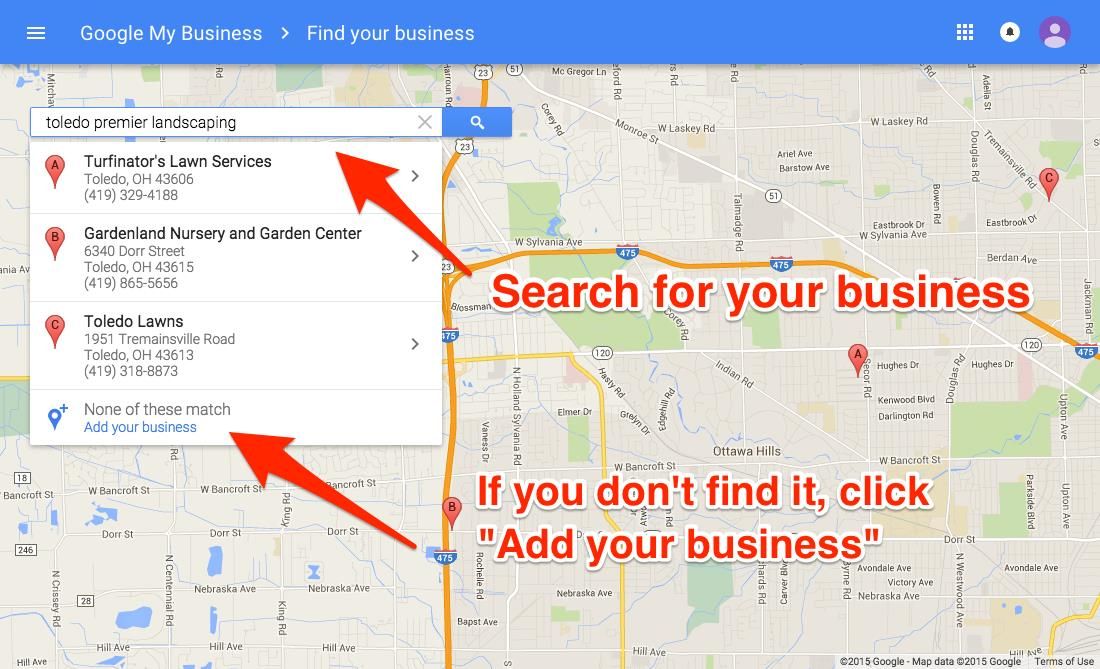
Search for Your Business
Google is good at finding information from around the Internet, so there’s a good chance they already have your business address listed. If so, click on your business to claim the listing.
If you don’t find your business, click “None of these match – Add your business.”
Pro Tip: When you enter your business information, use your DBA name, not your company’s formal tax return name. These are customer-facing results, so you want customers to recognize the name they see there.
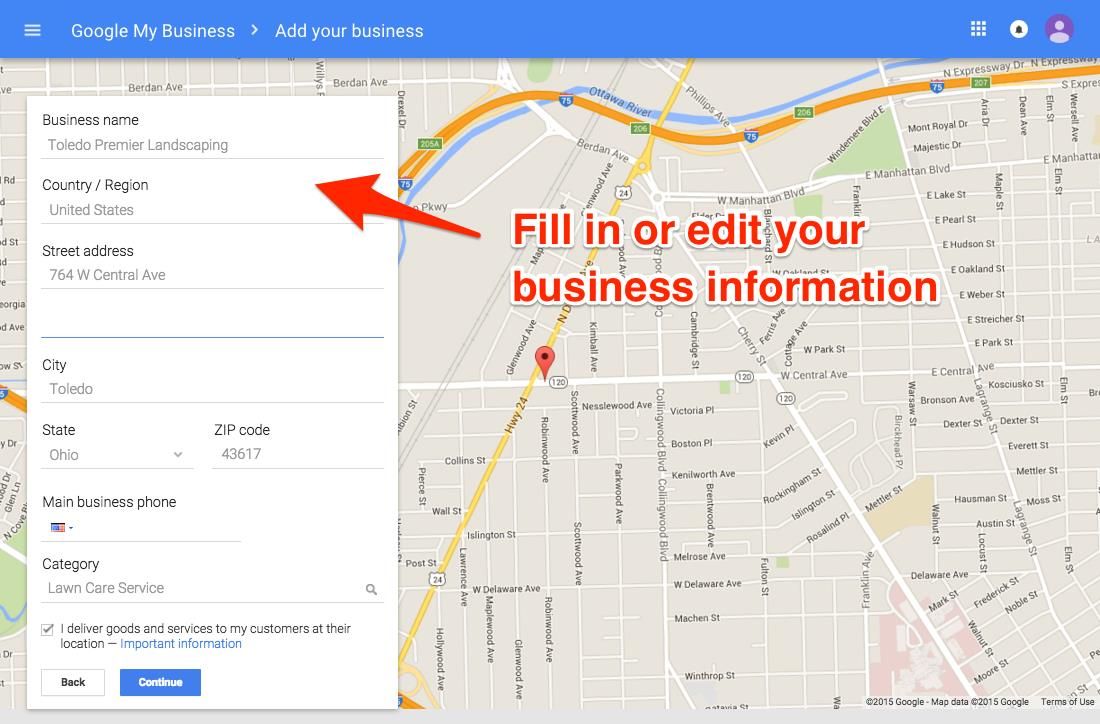
Enter your Company Information
You’ll see a screen to either enter or update your business information. If your business is already listed, this is your chance to correct any errors in your former listing. If you aren’t listed, you’ll have to fill in all the blank fields.
Pro Tip: Every detail matters. If you type in “545 Maple Ave,” Google might suggest you replace the “Ave” with “Avenue.” If Google suggests something like that, make the change. Everywhere you list your business from here on out, use the “Avenue” spelling of the street name for consistency.
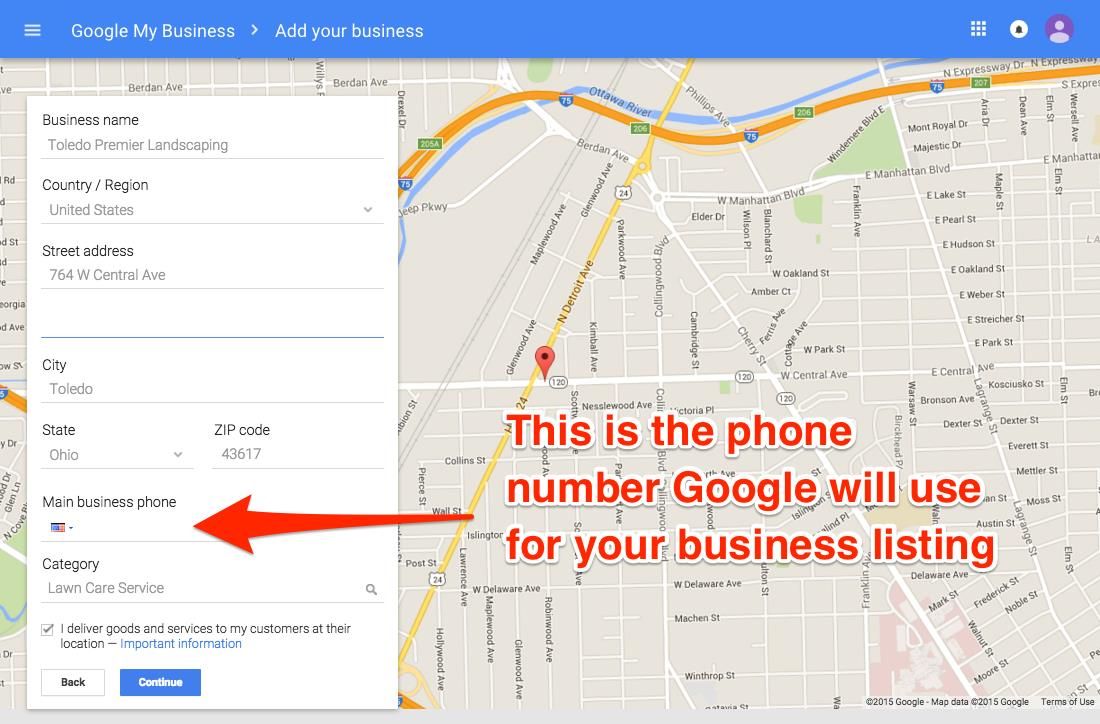
Add your Business Phone Number
Whatever phone number you provide will be the number Google lists for your business moving forward, so make sure you’re using the best number for customers to reach you.
Pro Tip: I strongly suggest getting a unique tracking phone number from a place like CallFire for this. You’ll be able to see who found you through these local listings, but still have it ring through to your phone or your company’s front desk. If you need insights on call tracking best practices, check out this article.
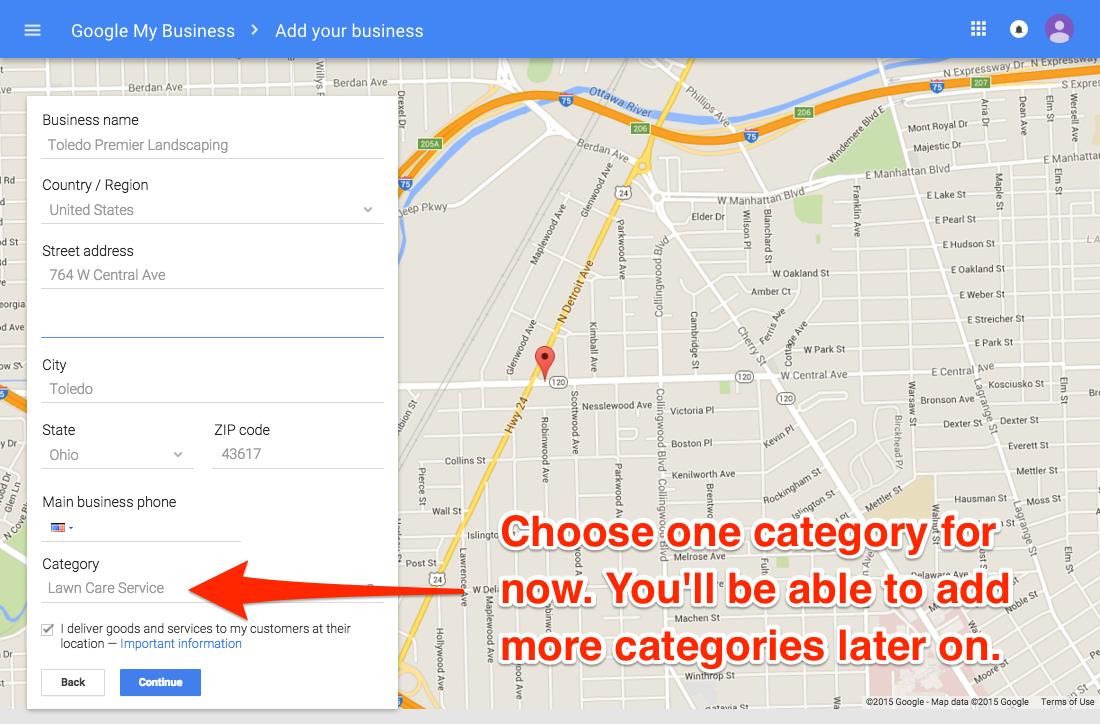
Pick One Category
In the past we could make our own categories, but Google recently changed this section of the signup form. Today, you’ll need to select a category from a list of Google-suggested options.
Pro Tip: Don’t worry too much about the category. Later — after you’ve verified your business listing — you can add unlimited additional categories.
Confirm Your Submission
Google will give you a chance to look over your information before submitting it. When you’re happy with what’s there, confirm your submission.
Wait For the Postcard
Your listing will not become “live” until you’ve entered a special code. Google will send this to you via a postcard in the mail.
Activate your Listing
When you get the card, log into your Google My Business account and enter the code.
What to Do Once You’ve Been Formally Listed
Once you’ve confirmed your Google My Business account, a host of opportunities will become available.
- You’ll be able to list as many business categories as you can find from Google’s suggested list.
- You’ll be able to write a company description to go with your local listing.
- Most importantly — you’ll have a better shot at reaching the 3-pack in Google search results.
Pro Tip: Once you have a Google My Business listing set up, any time you list your business on the web, make sure to use the exact same format you have listed in Google.
For example, 242 Tenth St. is different than 242 10th Street.
Don’t make Google guess if they both apply to you.
Conclusion
If you want your site to appear in Google’s local listings, they have established very clear-cut guidelines to make the process as simple as possible.
Despite the straightforward process, many businesses still don’t take the time to claim their listing. By doing so, they’re missing out on a valuable opportunity to rank higher in local search results.
Don’t make that mistake. Claim your listing and verify your Google My Business account.
It’s the first step towards helping you break into the 3-pack.
And — at the very least — it’s the best way for you to ensure your business information appears correctly when potential customers search for you in Google.


Hello Ryan,
Nice Blog and perfectly described what I need to do with GMB. Your post is so transparent that I never looked back twice to others tutorial when I was setting up my business in GMB. Very rich content and extremely helpful which includes step by step description which is really helpful to a beginner.